Here is a quick tutorial all about getting presets from Lightroom Classic to your Mobile device without too much trouble. This method also avoids having to use or download Lightroom Creative Cloud.
As always there is a video tutorial too, so if you would prefer, feel free to watch this. There is of course, lots more content over on my YouTube Channel.
If however, you would prefer to follow along here, then I have laid out the main points below.
Introduction
Firstly, I would like to be clear, this tutorial is mainly for Lightroom Classic users. I do not use Lightroom Creative Cloud, but I believe the presets sync automatically, if you use the Cloud based version of Lightroom.
The first thing you need to do, is choose a photo in Lightroom, and chose the 1 preset you want to have on your iPad or mobile device.
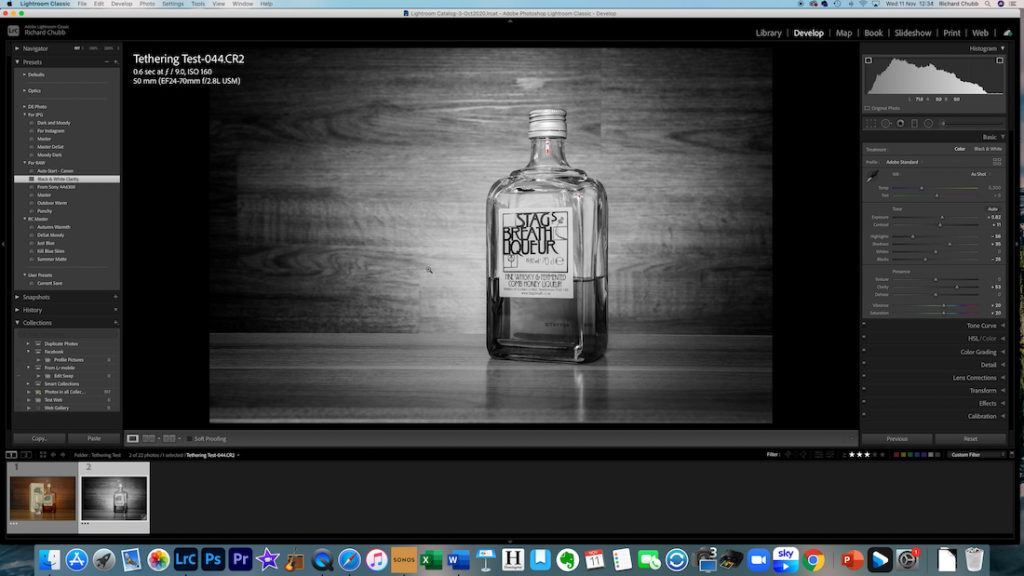
Once this is in, you then have to get this to your mobile device, with the preset setting included in the image.
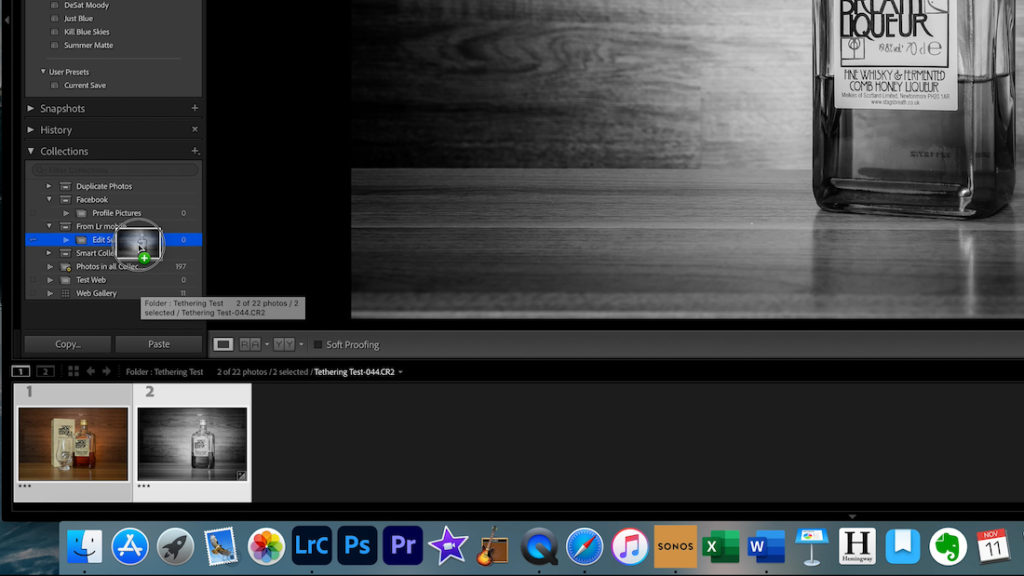
The easiest way I have found to do this, is to create a collection in Lightroom desktop, that syncs with your mobile.
I have one here called Edit Swap. Just drag the image with the loaded preset into that collection.
Working in Lightroom on your Mobile device
Once the images have synced from Lightroom Classic to your mobile device or iPad. Then you can set about saving the settings that are applied to that image, into a new preset on your Mobile Device.
Make sure the image with preset loaded on is selected on the screen. You will see the adjustments that have come over from Lightroom Classic. These should still be applied on your Mobile Device.

Once you have confirmed this is the case, you just need to tap on the 3 little dots at the top right of the screen.
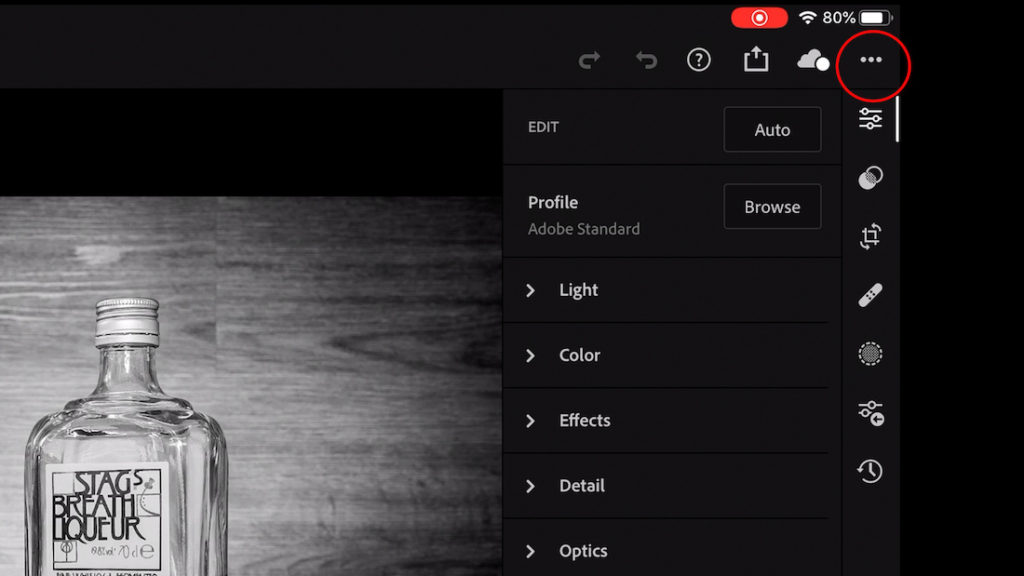
This will bring up another menu, giving you the option to Create Preset
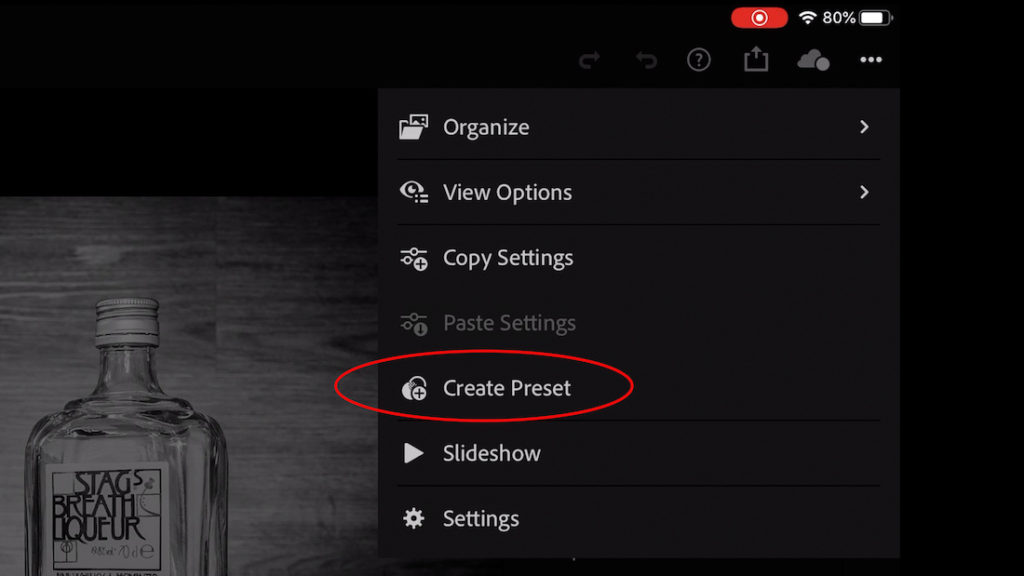
Create Preset Group and Save Preset
The next stage of getting presets from Lightroom Classic to Mobile is to actually save the edits on your image to a new preset.
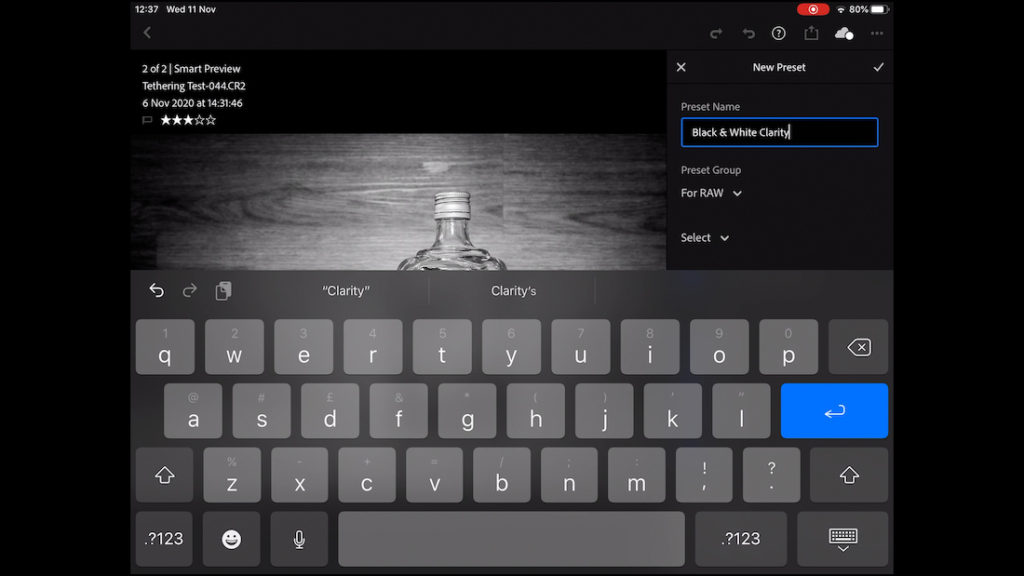
Under where it says Preset Group you can group all your custom presets into groups. Tap on this drop-down menu chose Create New Preset Group and name your preset group. See the below two images for this.
Once done, you can then just name the preset as you wish.
I am now trying to keep my preset groups and preset names in sync. This is so they match what I have in Lightroom Classic on the desktop.
Check Preset is saved and apply to other images
Now, all that is left is to check that the preset is in the Preset Menu on the Mobile Device. To do this, click on the Preset menu icon, shown below.
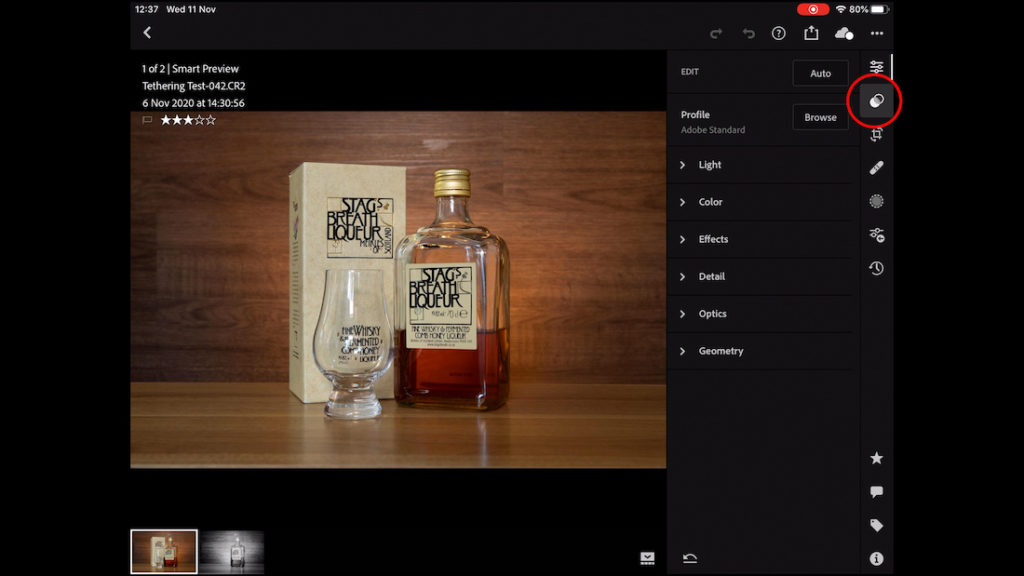
You should then be able to see the Preset Group, in this case called For RAW. And the actual preset called Black & White Clarity.
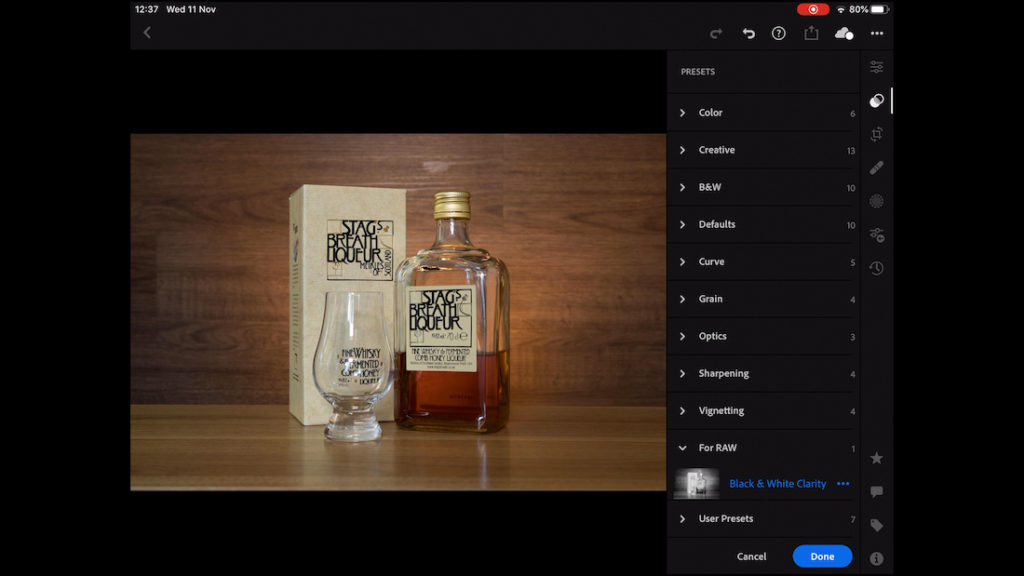
And that is pretty much it!
Summary of getting presets from Lightroom Classic to Mobile
So that is it. Really simple and straightforward way of getting presets from Lightroom Classic to Mobile.
Interested working out how to set up presets in Lightroom Mobile without using a desktop version? It is obviously the latter part of the above, or click here for a post just about that!
Thanks for reading, and don’t forget to check out other tutorials. Perhaps you are interested in Lightroom new Colour Grading Tool or how to focus stack?
In the meantime, thanks for stopping below, and I welcome any comments below.


